Last Updated on July 22, 2020 by g6nhu
Back in February, the UK was hit heavily by two overlapping storms, Ciara and Dennis and it was during these storms that my hexbeam took the hit that broke it.
Here you can see the aerials being blown about badly and although I didn’t realise it at the time, the initial damage had already been done.
You can see the centre post of the hexbeam is at quite an angle which I initially thought was just down to the direction of the wind.
It soon became clear that something was broken. It was difficult to tell but I thought that the centre post had worked out of the centre hub and was being held in place by the support ropes attached to the spreaders and the coax as can be seen here.

I hoped that the winds would drop enough for me to be able to safely lower the hexbeam and get it off the mast to prevent further damage.
Sadly that wasn’t the case, the wind just carried on relentlessly, the centre post lifted further and then the aerial collapsed to one side.

The centre post was now held in place purely by the spreaders and the winds carried on. It was only a matter of time before one of the spreaders couldn’t cope with the strain and actually snapped. I’ve highlighted the snap below.

As if to really rub it in, a few days later, one of the 40m extension tubes dropped out leaving me with an aerial that had totally collapsed and with a hanging element. It wasn’t pretty, being described as a waterlogged, dead spider.

It was another ten days before the weather dropped enough to be able to lower the mast and remove the aerial but because of my broken arm, I wasn’t able to actually do much. Terry KK6CW and Pete M1BRR were willing volunteers and along with a loan of some scaffolding from Paul 2E1PAW, we were able to get the aerial dismantled and removed from the mast.

The way we took the aerial apart was fairly straightforward. We simply removed each spreader one by one and let everything drop to the ground. It was a mess, I had all the spreaders, support ropes and elements just piled up together.
With everything off, we removed the stub mast and the centre post, refitted another stub mast with my ADS-B aerial and raised the mast up again. It’s interesting to note that even while my aerial was broken with the centre post laying horizontal, my ADS-B receiver still held on to the top position in the UK FlightAware statistic page.
With it all apart, it was clear what had happened. The centre post mounts through the centre hub and is held in place by a yellow collar and a large grubscrew on top and a couple of bolts underneath. The post had snapped at the bottom of the collar and lifted out. I hate to think how much pressure it took to do this.

Looking at the latest instruction manual for the hexbeam, the centre hub and post mounting mechanism has been completely redesigned since this aerial was bought and this shouldn’t be an issue in the future.
Investigation showed me that my hexbeam wasn’t as badly broken as I thought. To get it all back working again, I’d need the centre post repairing and I’d only need one spreader section.
I contacted the aerial manufacturer and after some discussion, we agreed that he’d supply me with a replacement spreader section and repair the broken centre post. In order to help prevent this happening again, I bought the extreme weather kit which braces the spreaders and helps take the load from the centre post. I also bought the hex-tilt mechanism which means that in future, I should be able to raise and lower the mast with relative ease and won’t have to rely on borrowing scaffolding in order to be able to do anything.
With everything here, I started work. It took me an entire weekend to remove the elements and untangle all the support cords from the spreaders. I also replaced the broken spreader section and repaired the 6m element because one end had snapped.
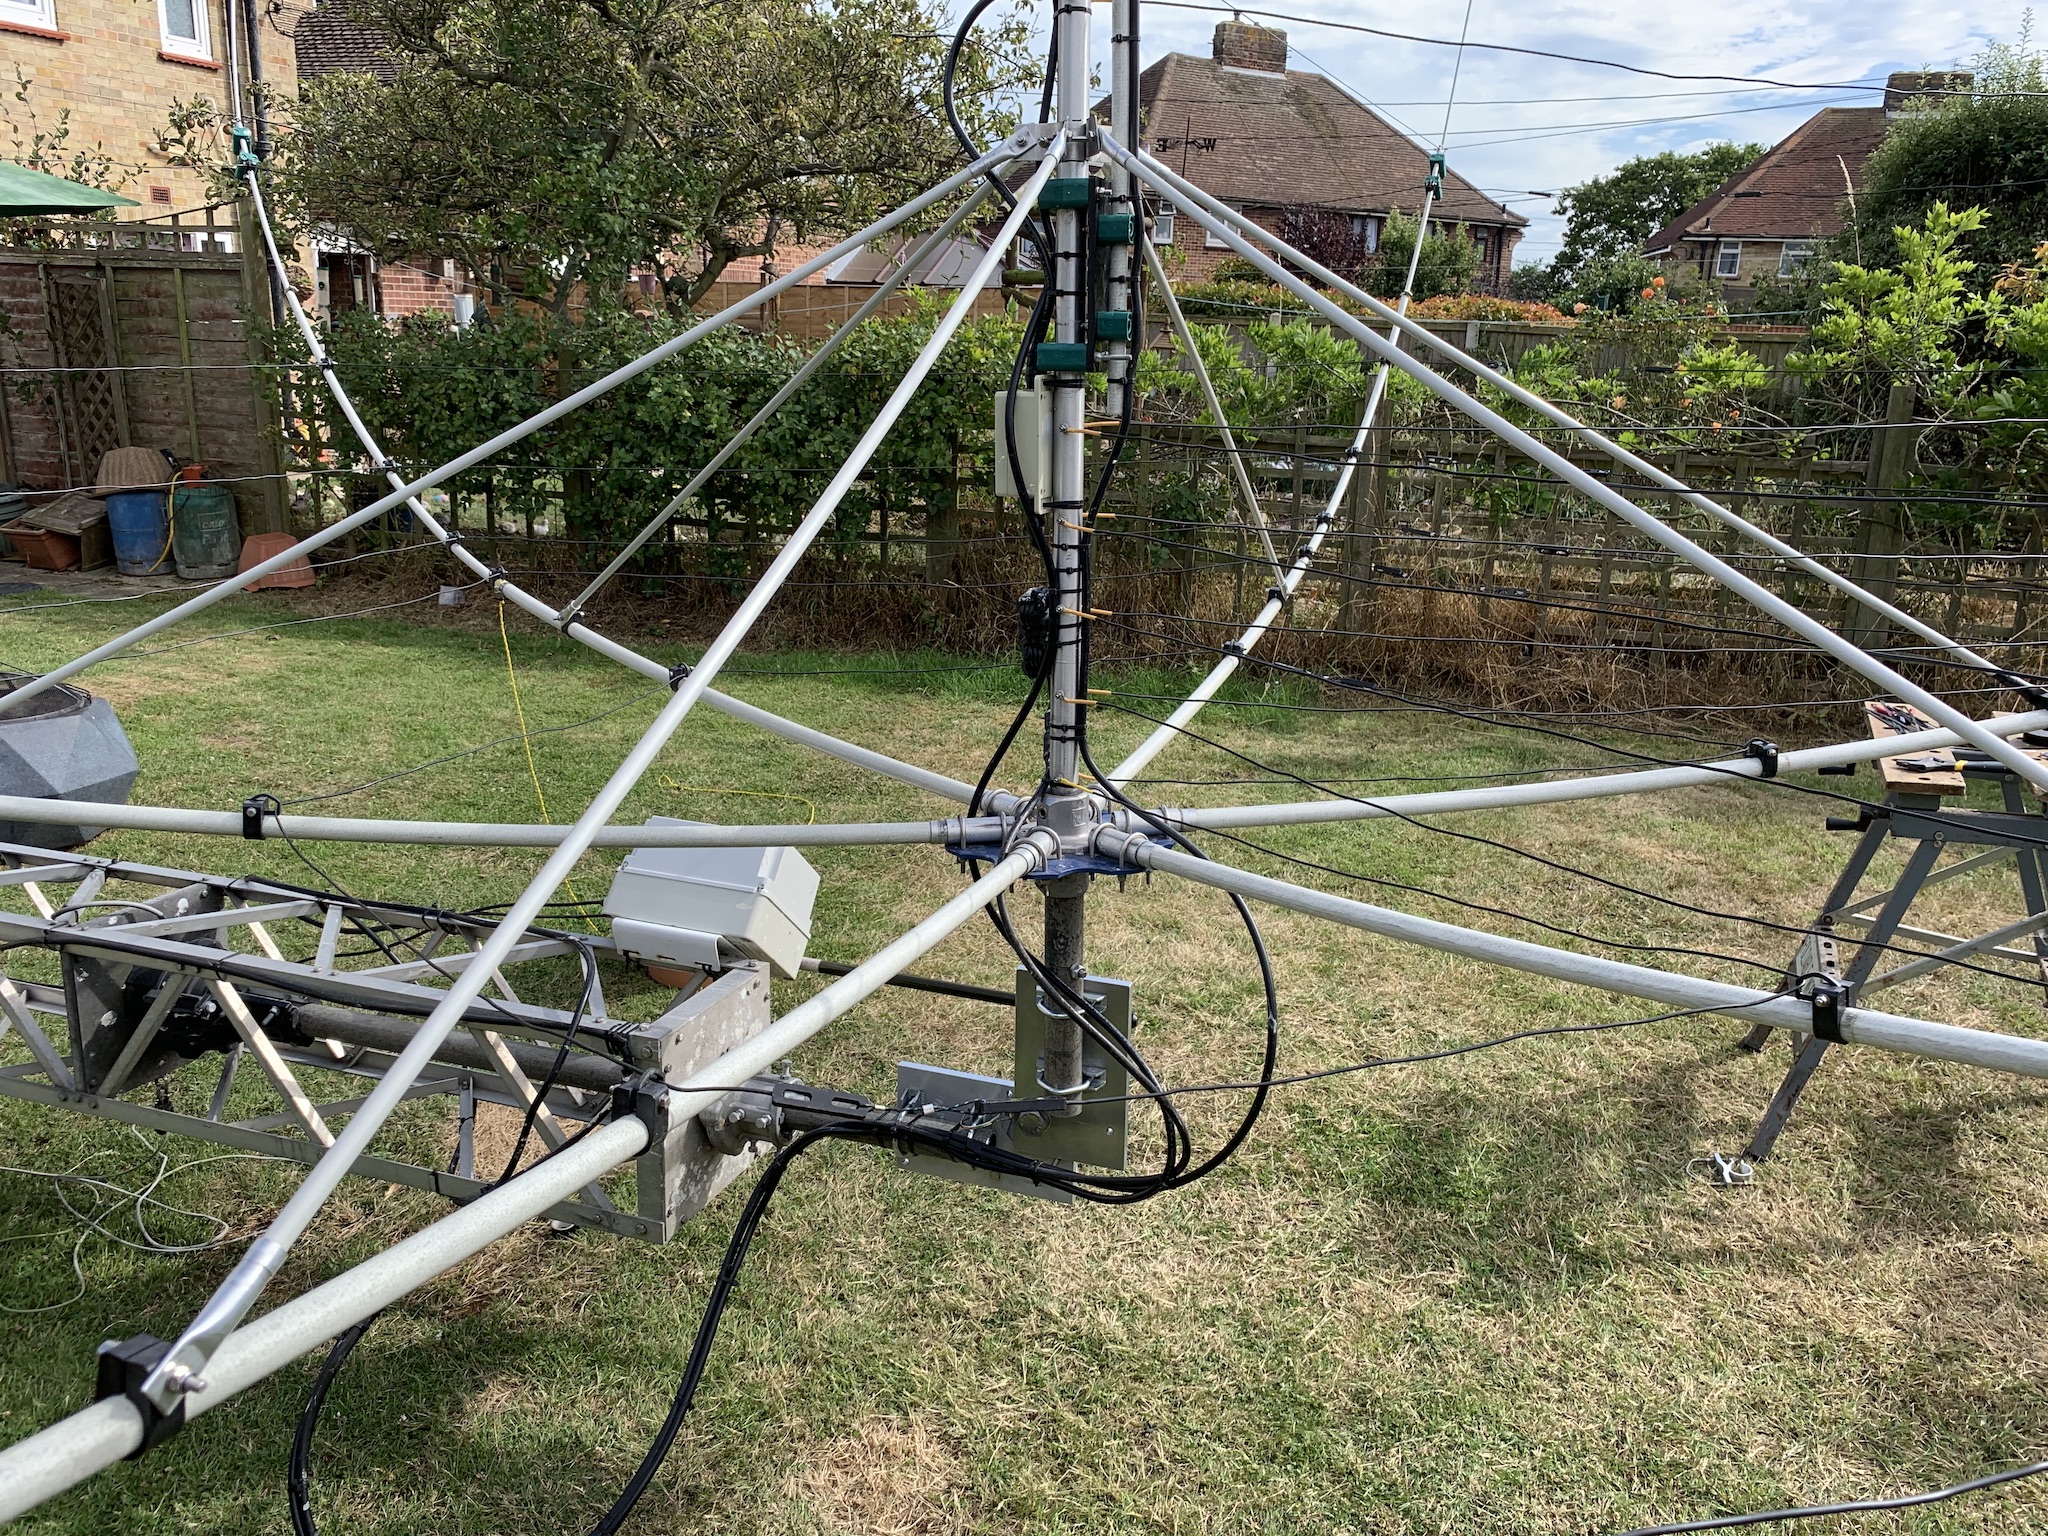
I re-assembled the centre post – I used the same balun for the main part of the aerial and put together a new coax stub between the balun and the feed point made from Hyperflex 10 and fitted the centre support bracket for the extreme weather kit. Since I bought the hexbeam, there’s been a new 40m balun which increases the bandwidth so I installed that on the top of the centre post extension.

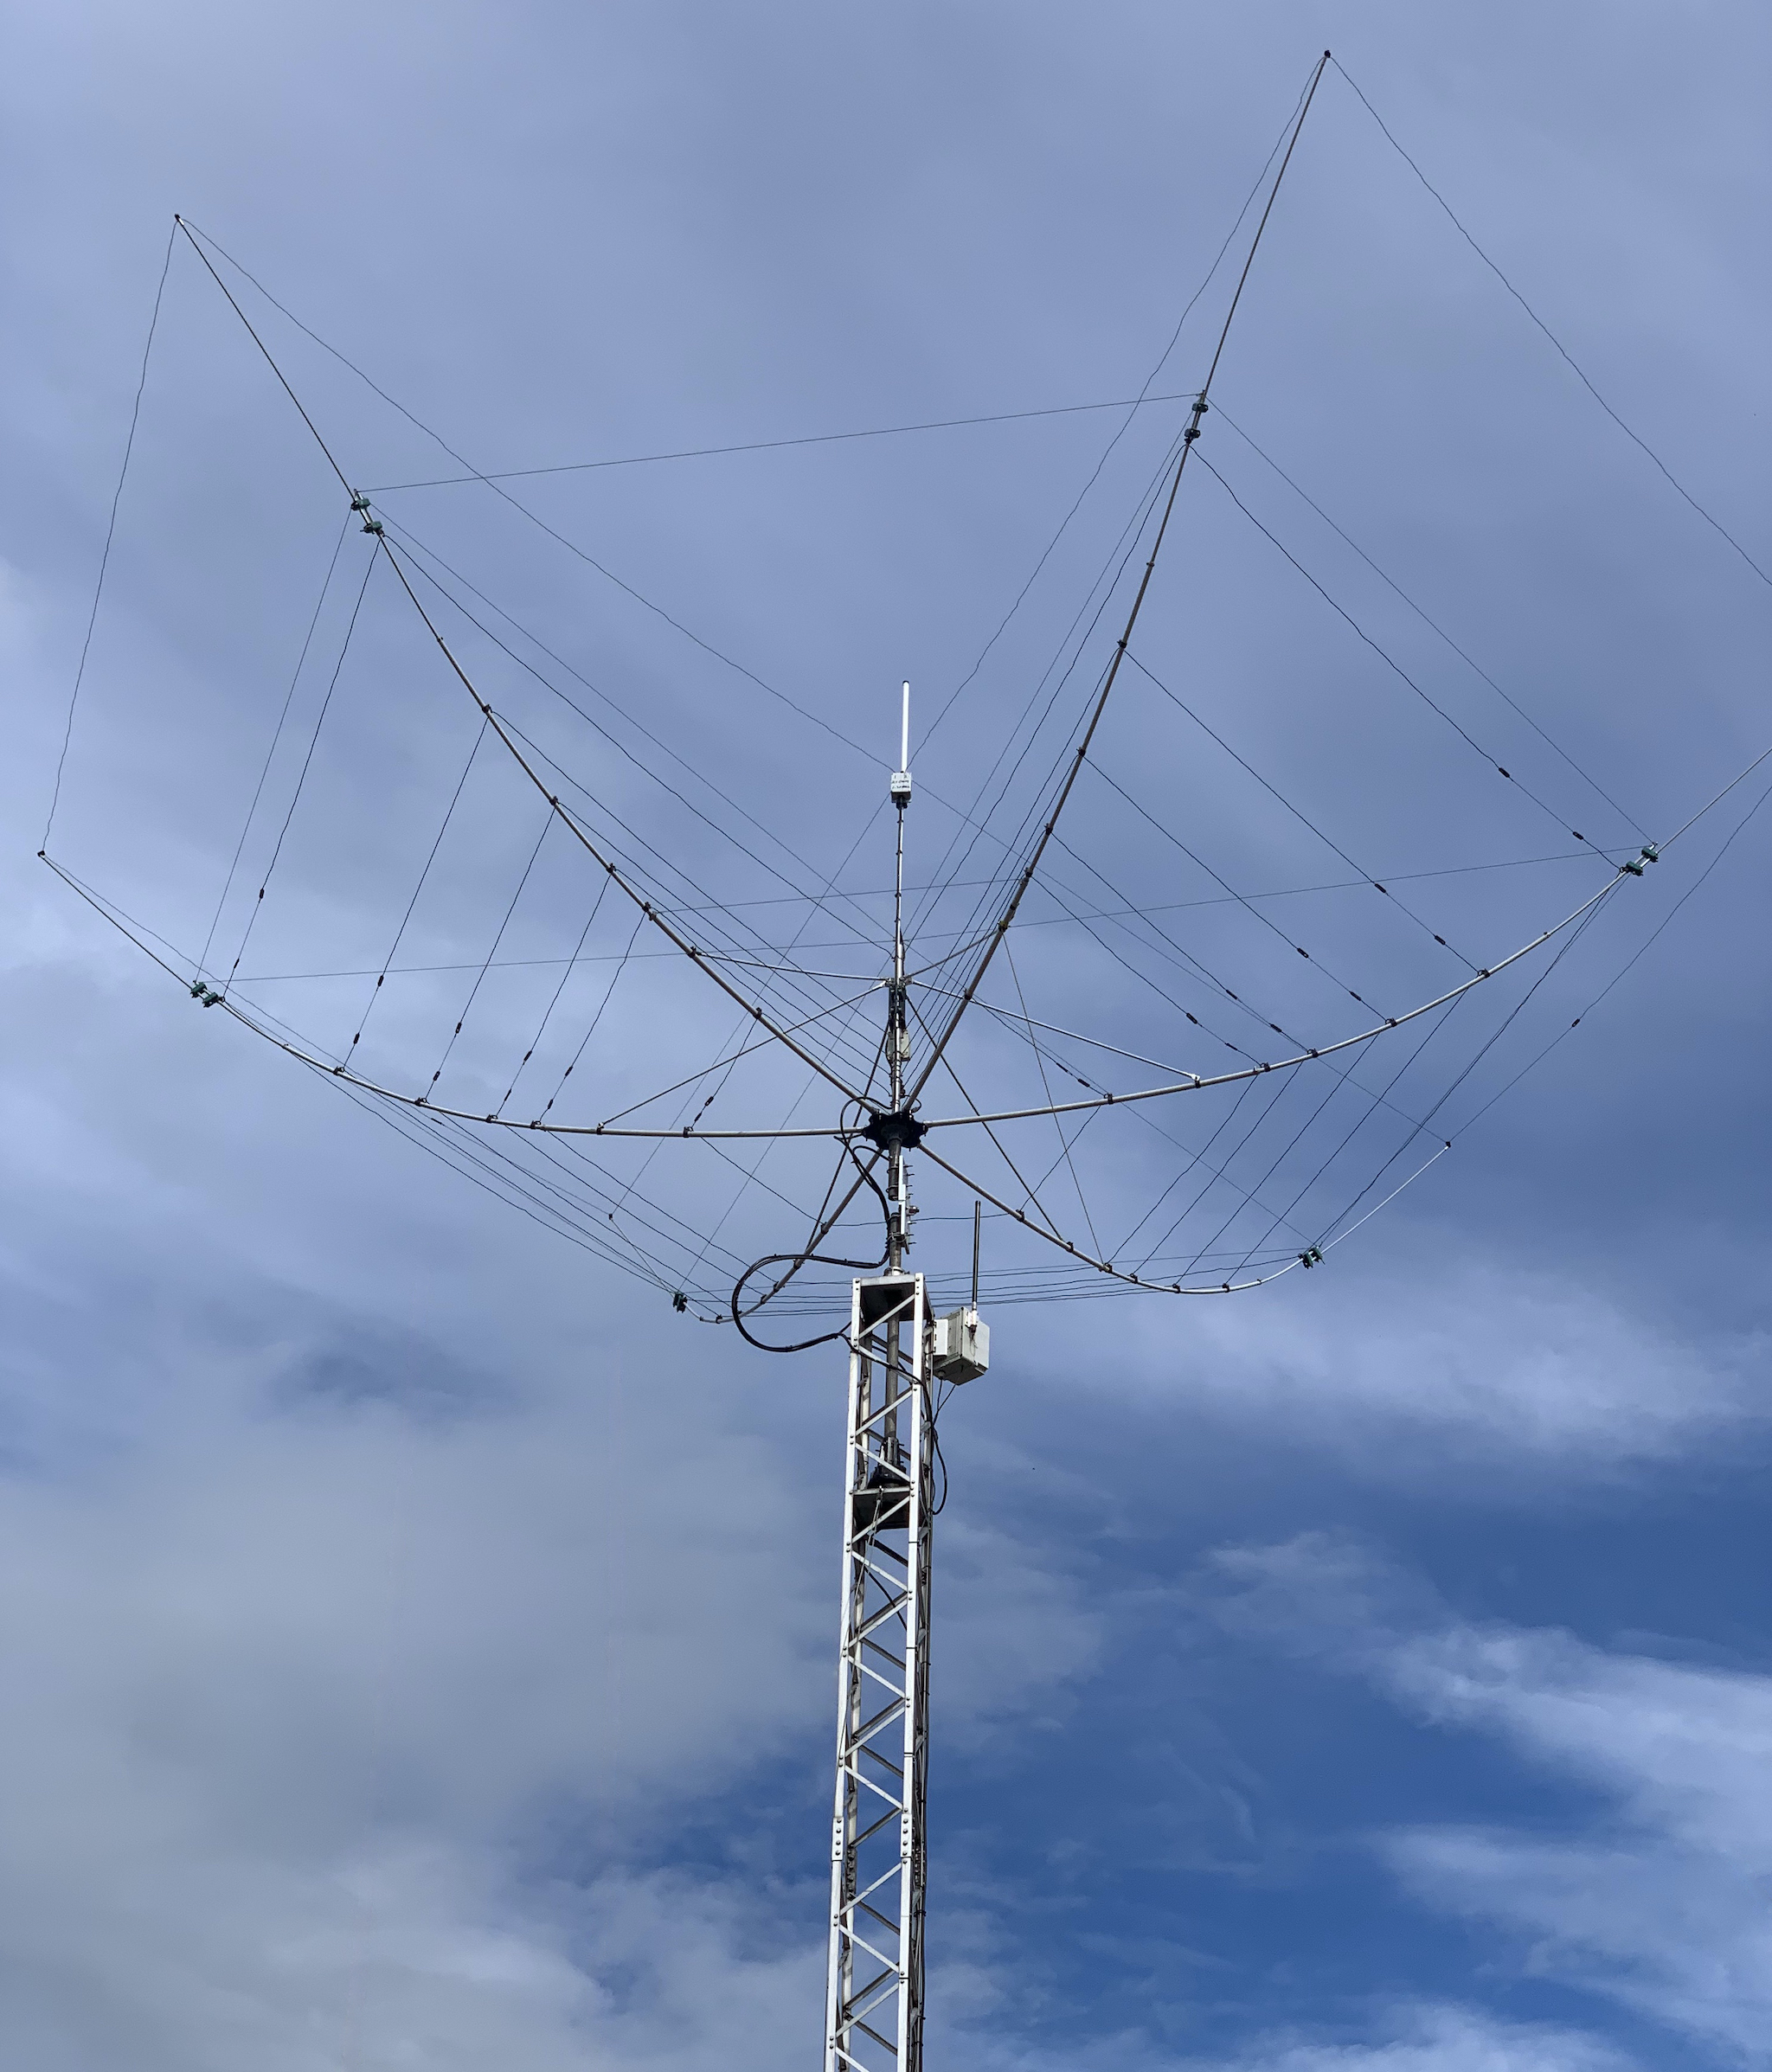
A couple of weeks later I started building the aerial. I spent three hours and got the basic aerial built including all the elements and the extreme weather kit. Regular visitors will know what a hexbeam looks like so here’s picture showing the new extreme weather kit. It consists of a bracket fitted to the centre post and struts that brace the spreaders into position. It stops them lifting when it’s windy and stops them from sagging under the weight of ice and snow.

The following morning I added the 40m extension kit and fitted the element. I lowered the mast and installed a short stub with the hex-tilt attached.

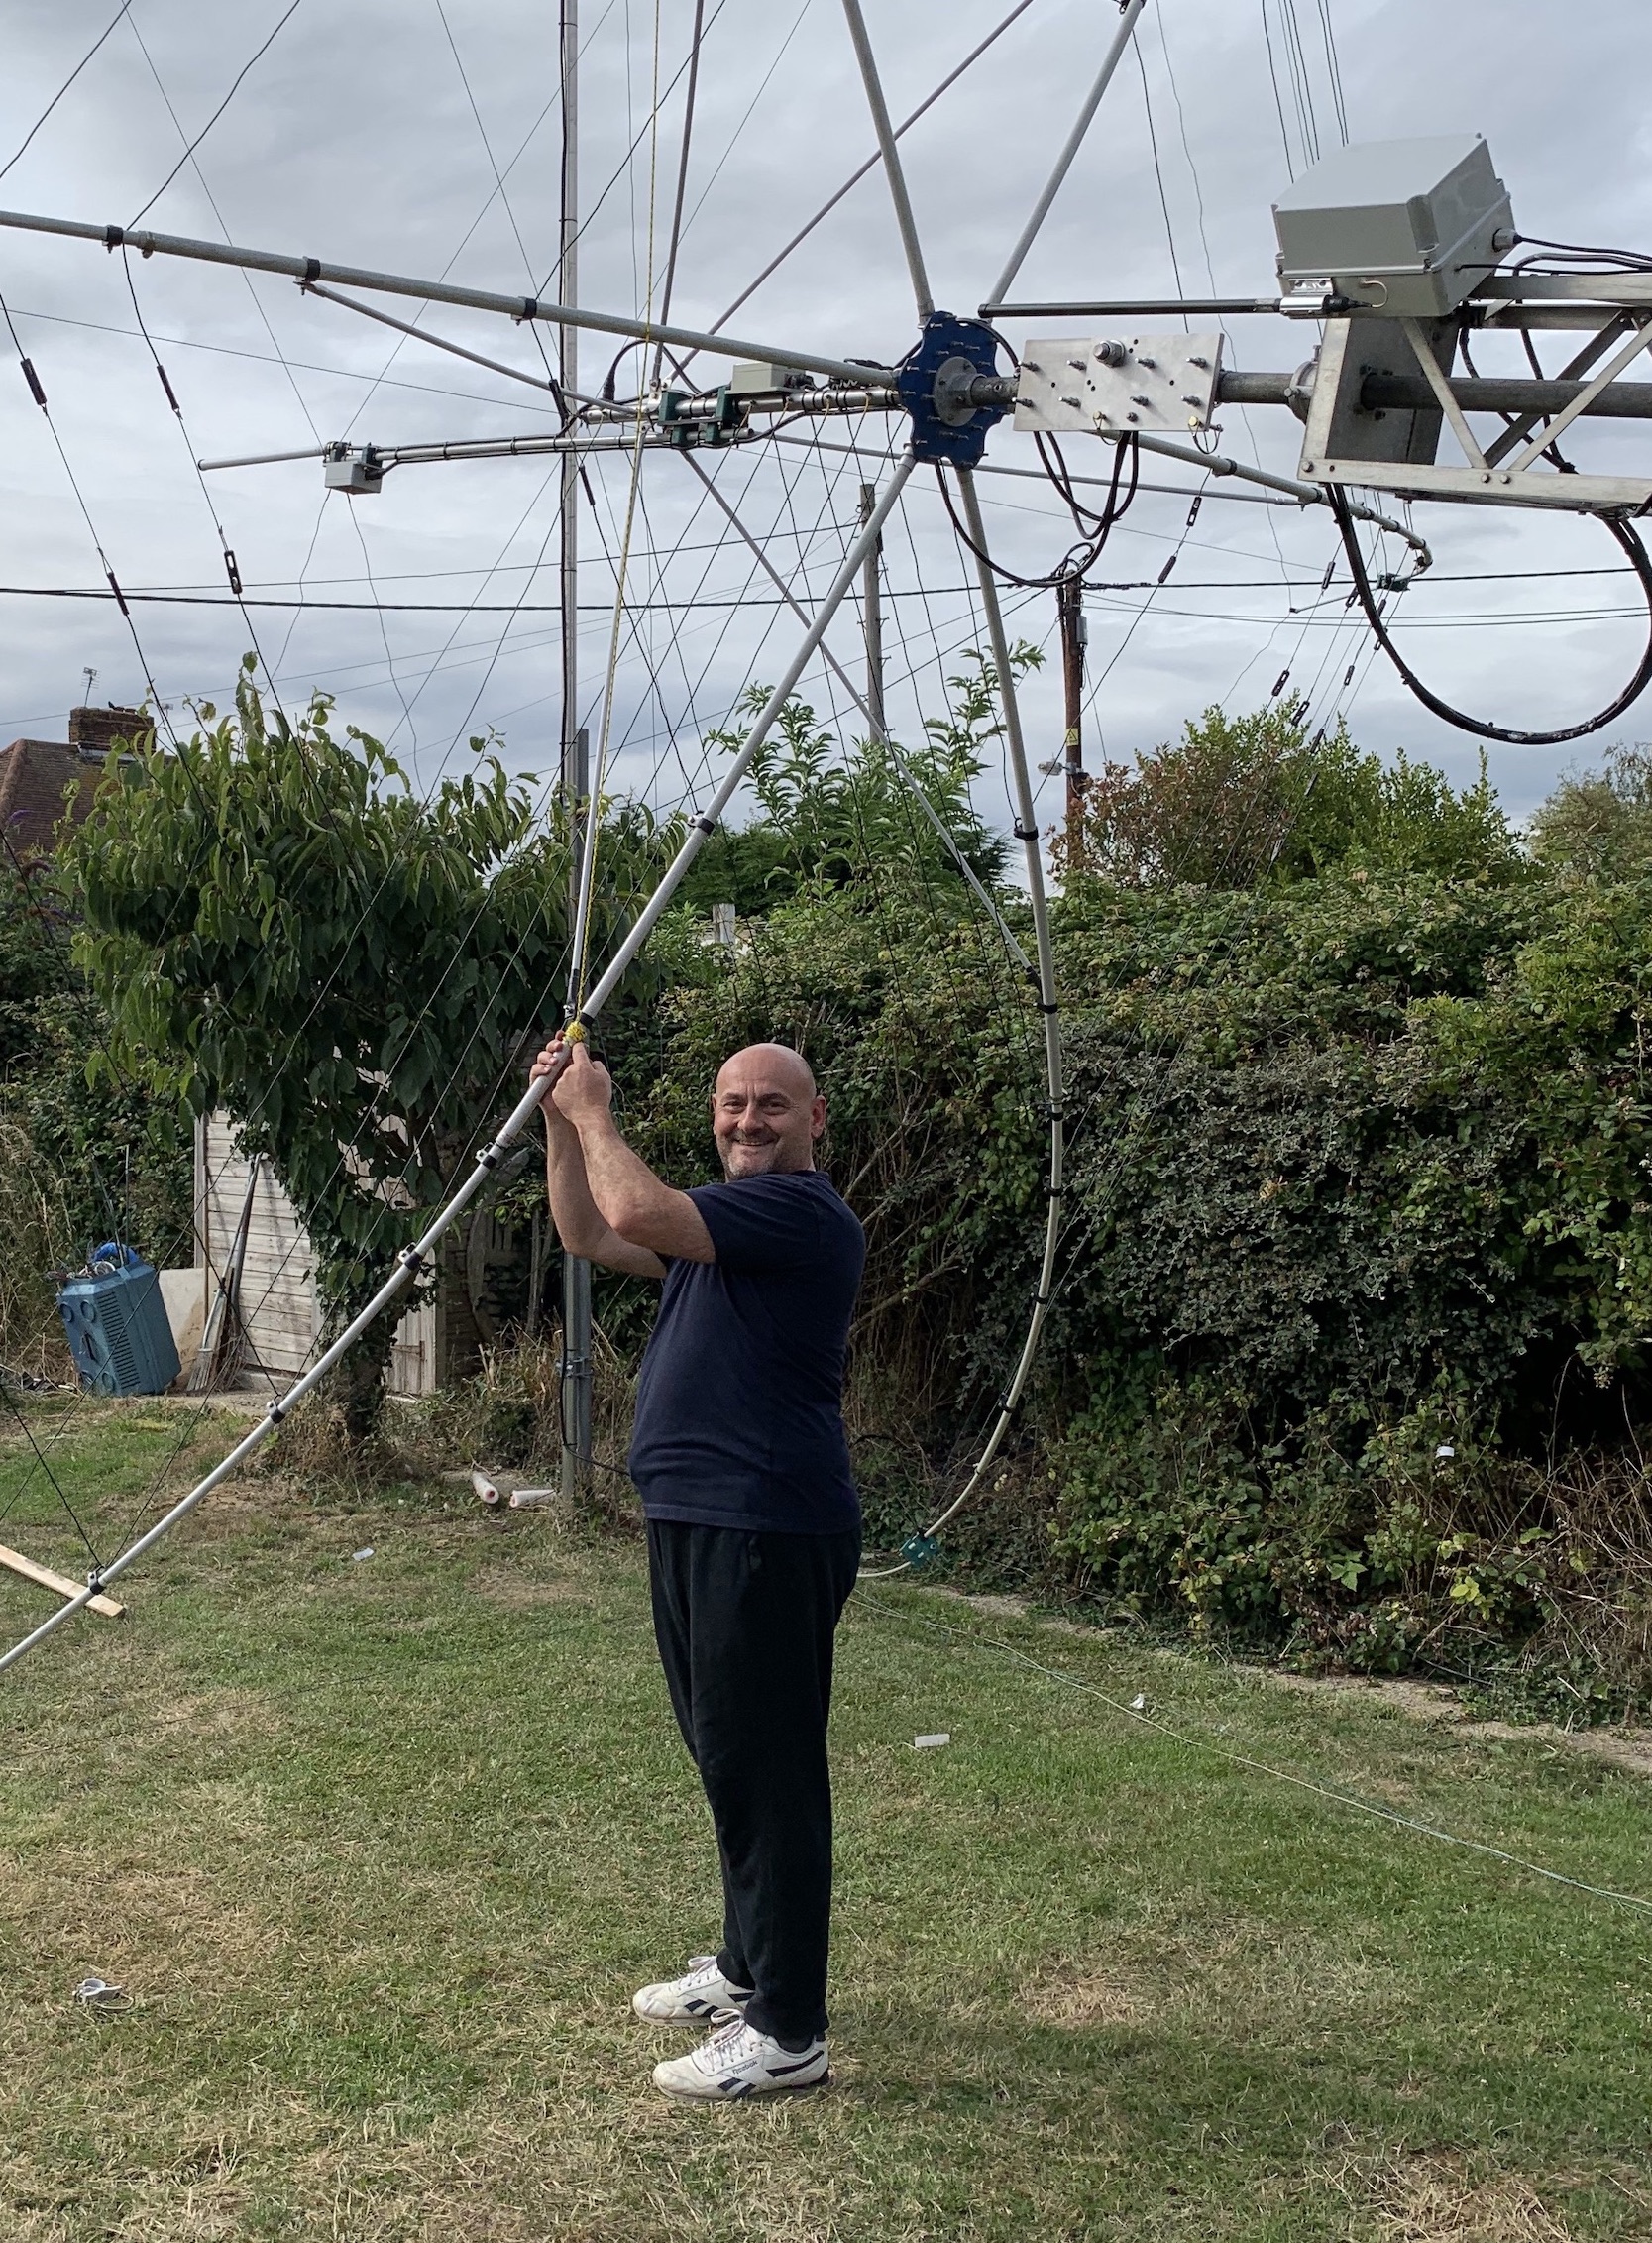
Paul, 2E1PAW kindly popped in to give me a hand as I wasn’t sure how easy this was going to be. Between us we easily moved the aerial to the new hex-tilt and fixed it all in place. This really was straightforward – The tilt makes it so easy to work on as the mast can be lowered to ground level while keeping the aerial vertical. This was really refreshing considering how difficult it’s been in the past to work on and having to use scaffolding.
The process was simple – Start raising the mast and slowly allow the aerial to fold to the usual position. Install the locking pins, tie off the rope that’s used to support the aerial and then raise the mast to vertical. The only difficulty we had was one of the spreaders getting tangled around my 30m dipole centre post but that was quickly dealt with.
All that was left was to wind the mast up and secure the retaining bar. I wasn’t sure if I’d notice the winch being harder to turn due to the slight increase in weight from the tilt but it didn’t seem any different.
After doing work like this, the question is always “How does it work?”.
I fired up the TS-590 and hit the tune button on 20m to see the SWR hit the stop. I checked the other bands and it was exactly the same – Not good.
I connected my VNA, did a sweep from 10 MHz to 30 MHz and this is the resultant plot.

40m was absolutely fine so the problem was with the main part of the aerial as the 40m extension has its own coax and balun. It was either with the coax itself, the balun, the coaxial stub or the repaired centre post. I did some more tests and by early evening, I decided that I’d lower the mast over the next few days, disconnect the coax and start testing.
While sitting in the shack a couple of hours later, I thought I’d recheck everything at this end to make sure I hadn’t done anything stupid. My SGC smartuner was still in the corner of the shack behind my TS-590SG and I double checked to make sure it wasn’t still in line. It wasn’t, the SO-239 and PL-259s weren’t connected to anything but it was still powered up. I disconnected the power and removed it out of the way and tested again.
Bingo! The SWR was now showing correct on each band as can be seen from the new VNA plot below.

All I can think of is that because the coax ran almost straight past the tuner was that some current was being induced in the tuner which then showed up as reflected power on the cable. It’s a very odd situation and something completely unexpected. I’m just pleased it was something simple and didn’t require any more work on the aerial itself.
The above is rubbish. I’ve left it there because it was my original diagnosis but it turned out to be wrong. The very next day, the SWR had gone bad again, back to the same as the original plot posted above. However, it was perfectly normal in the early morning and the evening. Over the course of a few days, I determined that when the weather warmed up, the fault came back and as it cooled down, the fault cleared.
A week later I lowered the mast for further investigation and determined that the fault was with the coax stub between the balun and the centre post. I made a new one and everything is good. I still don’t understand what the problem is with the original stub. I’ve checked it at DC with a meter and also put it on the VNA and it’s not showing any problems whatsoever.
On the plus side, I was able to lower the mast and work on the aerial very easily using the new tilt mechanism. If I’d wanted to replace the coax stub previously, I’d have had to set up scaffolding but now I can lower the mast all the way down and work on the aerial at ground level. The whole process of diagnosis and repair took just around an hour and a half.
Now I’m waiting for some windy weather so I can see how the aerial copes!
I’d like to thank everyone who has helped me with this, specifically Paul, Pete, Terry for their physical assistance and also to Ant David, MW0JZE who is the manufacturer of the aerial and has responded to my emails, calls and messages quickly and accurately. There are many different versions of the hexbeam available but from my experience, his aerial which is based on the design by G3TXQ (SK) is the best. It’s not just about the product but about the after-sales support. I have no involvement with Ant, I’m just a happy customer.
These two were some nasty storms indeed! I always hold my breath and keep fingers crossed when WX like that hits us. For this I’d hate to have multiple towers with huge antennas, I think that it is a 24/7 job to repair with all the storms we’ve been having over the last few years.
Glad to see you got it fixed. You’re probably safe for another 3-4 months :o)
73!
Very interesting topic, thanks !
I have a similar problem with bad SWR during cold mornings.
I will change my coax stub during the next maintenance.
Best 73 !